Installing drain screens and traps is a simple yet effective way to protect your plumbing system from annoying clogs and costly repairs. These tools serve as your first line of defense, capturing debris and preventing it from entering your pipes. In this post, you’ll learn how to properly install these devices, ensuring your drains remain clear and efficient. Taking these proactive steps will not only improve your plumbing’s lifespan but also save you time and money down the line.
Understanding Drain Screens
While clogs can lead to costly repairs and preventative maintenance, understanding drain screens can help you prevent these issues. Drain screens are simple yet effective devices that fit over your drains, capturing debris before it has a chance to enter your plumbing system. By installing drain screens, you take proactive steps to protect your home from the inconveniences of clogged drains.
Types of Drain Screens
- Mesh screens: Fine mesh materials that filter out small particles.
- Plastic strainers: Durable options that catch larger debris.
- Stainless steel screens: Rust-resistant and long-lasting.
- Pop-up drains: Screens that rise when water flows.
- Custom-fit options: Tailored to specific drain sizes.
After identifying the type of drain screen that suits your needs, you can effectively minimize the risk of future clogs in your plumbing.
| Type of Screen | Features |
| Mesh screens | Great for fine filtering |
| Plastic strainers | Cost-effective and lightweight |
| Stainless steel screens | Durable and rust-resistant |
| Pop-up drains | Convenient and adjustable |
| Custom-fit options | Personalized for your drain |
Benefits of Using Drain Screens
Types of drain screens offer various advantages that enhance your home’s plumbing system. By installing drain screens, you filter out hair, food particles, and other debris that could lead to blocked drains. This simple addition can save you time and money on plumbing services, reducing unpleasant odors and the risk of water damage. You’ll find that maintaining clean drains becomes much easier with these protective devices in place.
Drain screens not only prevent clogs but also promote better drainage efficiency, ultimately improving the lifespan of your plumbing. With regular maintenance and cleaning, these screens can help maintain clear pathways for water, so you can enjoy a worry-free bathroom and kitchen experience. Additionally, they contribute to a healthier home environment by reducing the growth of mold and odors associated with stagnant water in clogged drains. By investing in drain screens, you are taking a significant step in protecting your plumbing and ensuring your home remains functional and safe.
Choosing the Right Drain Trap
Some homeowners may underestimate the importance of selecting the right drain trap. The right trap not only helps to prevent clogs but also ensures proper drainage in your plumbing system. By understanding the different types and factors involved, you can make an informed decision that suits your needs and plumbing layout.
Types of Drain Traps
Types of drain traps vary widely, and each serves specific purposes:
| Type | Description |
| P-Trap | Most common, used under sinks to prevent sewer gases. |
| S-Trap | Essential for toilets, designed to maintain a water seal. |
| Drum Trap | Used in floor drains, features a removable cover for cleaning. |
| Grease Trap | Installed in kitchens to capture grease that can cause blockages. |
| Bottle Trap | A compact solution popular in limited spaces. |
Thou should choose a trap that fits your specific application and is compliant with local plumbing codes.
Factors to Consider When Selecting a Trap
Trap selection involves several factors that can greatly affect your drainage system’s efficiency:
- Type of fixture (sink, shower, toilet)
- Space availability in your plumbing layout
- Local building codes and regulations
- Frequency of use and maintenance considerations
- Budget for materials and installation
Recognizing these factors can help you select the most appropriate trap for your situation.
Traps play an vital role in your plumbing, and considering multiple aspects can streamline maintenance and functionality:
- Your plumbing layout
- Specific material types (PVC, metal)
- Size of the drain and flow rate
- Durability under various conditions
- Compatibility with existing systems
Recognizing these considerations will ensure you choose the right trap that meets your needs and enhances your home’s plumbing efficiency.
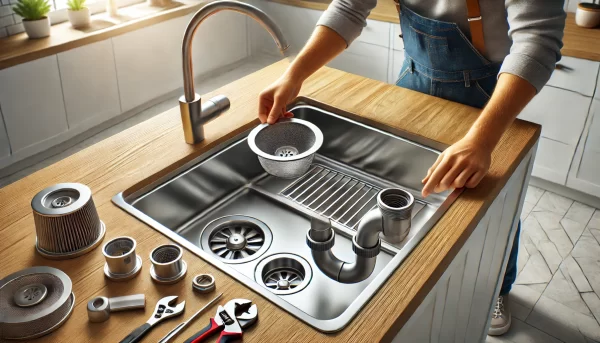
Installation Process for Drain Screens
Now that you’ve chosen the right drain screen for your plumbing needs, it’s time to learn how to install it effectively. Proper installation will ensure that the screen functions optimally, preventing debris from causing clogs in your drainage system. Follow the steps outlined in this guide to achieve a successful setup.
Tools and Materials Needed
The important tools and materials you’ll need for installing drain screens include a screwdriver, pliers, a measuring tape, and the appropriate drain screen that fits your plumbing. Having a bucket on hand for any excess water will also be helpful during the installation process.
Step-by-Step Installation Guide
Any installation of drain screens can be broken down into simple steps. Below is a table summarizing the installation process:
Installation Steps
| Step | Action |
| 1 | Turn off water supply or drainage system. |
| 2 | Remove any existing components from the drain. |
| 3 | Clean the drain to remove debris and residue. |
| 4 | Position the drain screen over the drain opening. |
| 5 | Secure the screen using screws or clips as needed. |
| 6 | Test the drain to ensure proper fit and function. |
Installation of a drain screen can elevate the efficiency of your plumbing by preventing foreign objects from entering the drainage system. This straightforward procedure involves securing the screen over the drain and checking for leaks. It’s advisable to conduct regular inspections of the screen to ensure it’s not clogged and is securely fastened in place. If your screen has a removable catch basin, clean it periodically to maintain optimal performance.
Installing Drain Traps
Not only do drain traps prevent clogs, but they also help eliminate odors from your plumbing system. By ensuring proper installation, you can maintain the health of your drains and minimize costly repairs. This process involves selecting the right size and type of trap suited for your specific drain to maximize its effectiveness.
Preparing for Installation
The first step in preparing for installation is to gather the necessary tools and materials. Have a new drain trap, plumber’s tape, a wrench, and a bucket on hand. Ensure the work area is clean, and remove any existing trap or debris to facilitate a smooth installation process.
Installation Steps
The installation of a drain trap involves a few straightforward steps. Start by turning off the water supply and placing the bucket under the sink to catch any residual water. Next, remove the old trap by unscrewing it carefully, and then position your new trap in place, ensuring a secure fit before tightening all connections.
At this stage, you should check for any leaks by turning on the water supply slowly. If you notice any leaks at the joints, use plumber’s tape to seal them properly. Lastly, test your drainage to confirm that water flows freely through the new trap. Completing these steps ensures your plumbing system remains functional and free of future clogs.
Maintenance Tips for Drain Screens and Traps
After installing drain screens and traps, it’s necessary to maintain them for optimal performance. Follow these helpful tips for keeping your drains clear and functional:
- Regularly inspect screens and traps for debris.
- Clean them monthly to prevent buildup.
- Replace any worn or damaged parts promptly.
- Consider using biodegradable practices for cleaning agents.
Thou can enjoy clog-free drains with consistent maintenance.
Regular Cleaning Procedures
Tips for cleaning your drain screens and traps include using warm soapy water and a soft brush. Always ensure that you remove any collected debris first and rinse thoroughly before reinstallation. By following these simple steps, you help prolong the life of your drain components.
Signs of Wear and Tear
Procedures for identifying wear and tear include examining your drain screens and traps for cracks, corrosion, or any misalignment. Signs of wear might lead to insufficient drainage performance, so proactive assessment helps in maintaining efficiency. Catching these issues early could save you from more complex repairs later on.
Regular inspection will uncover potential problems such as discoloration or physical damage. If you notice any of these indicators, it’s best to take action immediately. Additionally, ensure that you check for any rusting or unusual noises during drainage. Addressing these concerns promptly not only protects your plumbing but also saves you time and money in the long run.
Troubleshooting Common Issues
For effective maintenance of your drain screens and traps, familiarity with troubleshooting common issues can save you time and effort. If you experience slow drainage or recurring clogs, pinpointing the source of the problem is important. Regularly check your drain screens for debris buildup and ensure your traps are functioning properly to prevent water accumulation.
Identifying Blockages
Troubleshooting starts with identifying blockages in your plumbing system. Look out for signs such as gurgling sounds, slow water drainage, or foul odors. These indicators often point to an obstruction in the drain line, which might be caused by hair, food waste, or mineral buildup.
Solutions for Common Problems
With the right approach, you can easily address common clogging issues. Start by clearing any visible debris from your drain screens and traps. If blockages persist, a combination of hot water and baking soda can help dissolve grease and debris. Regularly inspecting and maintaining your drain screens will also reduce long-term issues.
Common practices for resolving clogs include periodically flushing your drains with hot water, as this helps to prevent buildup. Using a mixture of vinegar and baking soda can effectively break down residue. If you encounter stubborn blockages, a plumber’s snake may be required to reach deeper clogs. Developing a routine for maintaining your drains will ensure efficient performance and minimize the frequency of clogs.
Final Words
Following this guide on installing drain screens and traps, you can effectively minimize the risk of clogs in your plumbing system. By taking these proactive steps, you protect your drains from debris and buildup, ensuring your water flows smoothly. Regular maintenance of these components will further enhance their effectiveness, so make it a priority to check and clean them periodically. Investing a little time in these simple installations will save you from potentially costly plumbing issues down the line.